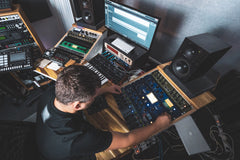
Tutorial: Unlock hidden sound tricks in Ableton Live 10’s effects

Put away the plug-ins for a moment – you’ll find sometimes focusing on the internal effects in Ableton Live is a great way to get into a creative flow. But often, Ableton’s trademark minimalism could make you overlook some important sonic possibilities tucked behind inconspicuous UI controls. Here are some places to look for inspiration to make some new sounds you might have missed.
Last time, we talked about how to finish tracks in "Super Fast Arrangement in Ableton Live 10". This can give you ideas for starting tracks, starting remixes, or taking tracks in a different direction. And those are perfect times to break old habits - or develop some habits that tend to yield lots of different results in different circumstances.

Grain Delay: Tame this 'classic' Ableton effect. Grain Delay is one of the first effects ever added to Ableton Live – so probably you’ve ignored it. And some of its characteristic “bubbling” effects may sound a bit too particular. But it’s powerful.
First, one element of the user interface design is confusing: those buttons on the bottom toggle between different mappings of the X/Y Controller (Delay Time, Spray, Frequency, etc.). The buttons on the left assign a parameter to the Y axis.
Sometimes it’s better to work directly with the parameters along the left-hand side for more precision and less of that over-the-top “oh, it’s the Grain Delay again” sound. Try leaving Frequency in place, or even turning it up. Increasing the Frequency smooths out the resulting grain texture. If you work with Pitch and add small amounts of Feedback and Rand Pitch, you get an interesting lo-fi-sounding resonator effect. Using the Sync controls and turning up Feedback delivers tempo-synced, pitch-shifted sounds. (Some of the Drum Racks also have Delay built-in, so combining the two makes for some weird dubby results, as I discovered accidentally while drafting this.)

Compressor: Find extra sound shaping features, and get more visual feedback. Live 10.1 has combined two compressors from previous versions of Live into a single, very powerful Device. Click the disclosure triangle on the Device Title Bar to expand all the more “advanced” functionality. This includes a Sidechain EQ section, which lets you shape the output of the sidechained signal. For instance, using a highpass filter lets you produce a subtler effect, as you might to clear away bass frequencies from your output when sidechaining a kick as input.
Just as vital, there are three modes – and I bet a lot of users just leave them on the default or switch to a third-party plug-in. “Peak” is the faster setting, responding to short peaks (like transients, for instance) in the signal. RMS averages the signal and responds more slowly. Expand lets you use the Compressor as an upwards expander – yes, this is really a compressor/expander, not just a compressor, which gives you a range of new dynamic options.
And if you’re still learning what jargon like that means, you’ll also definitely want to check out the View controls on the bottom. Transfer Curve and Activity View (those tiny graphical icons at the bottom, next to knee) give you alternative visualizations of what the Compressor is doing to your signal, which may help you to better understand the impact of tweaking the controls.

Echo: The “Morph” setting hides more sounds. Ableton’s Echo is really various effects built into one interface, based on both digital delays and historic hardware and modeled analog and tape echo. There’s so much in there, in fact, that different models are actually hidden in the parameters. For instance, check Noise and Wobble in the Character section. If you turn up the Amount, this will be clearer, but the mysterious “Morph” parameters in those two sections actually let you dial through different recorded noise sounds (Noise) and different emulations of the irregular delay time found on tape delays.
You could practically use those Noise sounds as an instrument on its own – hello, enormous drones. The Wobble effect will be more subtle if you set Amount to a more sane percentage.

Echo: Try running the Reverb in Pre, Feedbk. There’s also a beautiful reverb model built into Echo – combined with the vintage delay emulations, you can convincingly fake having worked in a big studio of analog gear, all while you did a production on a bus on your laptop. But to really exploit that Reverb, experiment with setting the signal chain location from Post (the default) to Pre or even Feedback – the dropdown is located just below the Reverb setting on the right. Set to Pre, each delay tap will include the reverb, rather than just applying reverb at the end. In Feedback, the reverb will actually be located inside the Feedback loop – so get ready for some spaced-out sounds.

Clip Dry (top), Invert Feedback (bottom, ∅).
Echo: Toggle Invert Feedback. Two nondescript little toggles in the Echo Device are very useful. Invert Feedback is the Null (∅).
Delay with Feedback is already a whole sound design topic on its own. You can create resonator effects with short delay times and large feedback, for instance. It’s actually really hard to describe what Invert Feedback does – well, it inverts the feedback signal before adding it to the original, but that doesn’t tell you what it does. Try it with short delay times and switching it on and off for comparison; you’ll often discover different timbres this way.
Echo: Clip Dry. ‘D’ is Clip Dry. There’s a nice, hardware style overdrive built into the Input Gain section. So turn up the Input dial, with ‘D’ selected, and both the wet and dry signal will sound as though they’ve been routed through the virtual hardware of the Echo Device.
This actually means you can even use Echo to add a little signal warmth / saturation to any channel, by setting Dry/Wet to Zero, turning up Input, and toggling ‘D’. But you could use the Saturator for that, which I believe has the same models in it.

Delay: Explore the different delay modes and modulated delay time. The Mode controls on the right-hand side of the new Delay Device switch between three “delay transitions” – that’s the sound you hear when you move around the delay time. Repitch acts like a tape delay, and you get a sweeping pitch sound as the delay time moves. Fade crossfades between levels. Jump skips immediately to the new delay – which can cause little glitches, though you might decide you like that if you’re into a cut-up click sort of aesthetic.
The trick here is to try combining the delay modes with modulated delay time. Try switching to Fade, then turn up Modulation > Time. Adjust Feedback and Delay Time for even more effects, including some really extreme time modulation if you crank everything.

FREE Sample pack: 542 Techno Loops & Oneshots
Download in here: Free Sample Packs

Delay, Pedal, Reverb: Make MIDI-mapped “pedals.” Delay and Reverb each have a Freeze parameter. That’s no fun when you just click it on and off, but if you map it to a MIDI input (or a key, using the KEY overlay, if you don’t have a MIDI device handy), you can make this freeze parameter into a live, performance pedal. See also the Pedal device, which has a Sub toggle.
Click MIDI or KEY to activate the overlay, then try mapping, say, Reverb Freeze to a MIDI note or even better a pedal if you have one around. Then as you play, you can trigger big sustains. Speaking of Reverb -

Reverb: Use the underrated original reverb parameters. Reverb is another of the original Ableton Live devices. It’s easy to then dismiss it – but it’s a really artistic effect. The Early Reflections section controls (and Shape knob) handles the early portion of the reverberant sound, whereas Diffusion Network deals with the longer portion of the reverb tail.
The best way to discover the possibilities here is really to experiment. Rather than thinking of “Reverb” as a device for simulating spaces in the conventional sense, you can use the Reverb Device as a sound design tool all its own. Try adding short sounds as input, but modulating large reverb tails. Experiment with Wet set to 100%. Reverb, like Grain Delay, has a lot of the artistic hallmarks of Monolake, the artistic duo that just happens to have included Ableton co-founders Gerhard Behles and Robert Henke. You don’t have to mimic their sound – on the contrary, now with a generation separating us from their music, Reverb feels like a tool worth revisiting to find new sounds. It’s a perfect antidote to reverb plug-ins that tend to lead you to established production techniques and predictable results.

Convolution Reverb: Use your own convolution sources. Convolution is a digital process that allows you to use one audio waveform as a “filter’ for an input. The Convolution Reverb draws on this idea as a way of accurately simulating how sounds would reverberate in real-world spaces. Both Convolution Reverb and Convolution Reverb Pro, found in Live’s Max for Live devices, support custom IR files (impulse response).
If you want to be more practical, you can load IR files you find on the Internet, or record yourself, meaning you could have your studio toilet as a reverb preset.
But convolution itself does not necessarily mean only “reverb.” You can use any audio you want, for more experimental results. And since you can drag and drop audio not only from your hard drive, but also from other clips, well… you can use this as a way of disrupting your projects. Convolve audio with itself for eerie, ringing feedback. Or try convolving clips with other clips. (To allow clips to be dragged as audio, if they aren’t already, Freeze Audio, then right-click, and Flatten Audio.)
One interesting approach, for instance: convolve a groove with another groove, for a sort of shadowy, percussive delay.
There's more - in Convolution Reverb Pro, you can choose Split mode and load different impulses for early and late reflections. This turns the whole effect into a creative sound design tool.
Oh yeah, plus all of this gives you material you can use live in a performance, since the Convolution Reverbs work in real-time.

Saturator: Try the waveshaper and unlock extra controls. The Curve Types dropdown located just below the Shaper Curve display defaults to Analog Clip, but there are a bunch of additional modes. Select Waveshaper, and you can use all six of the parameters at the bottom right – Drive, Curve (adds third-order harmonics), Depth, Lin (adjusts the linear portion of the curve), Damp (damping), and Period.
Waveshapers are deep in their ability to transform all kinds of sounds. They’re even a fundamental element of the West Coast Synthesis approach favored by lots of modular synthesists – but you can work with them just as easily just by dropping the Saturator into an effects chain or Device Rack. Try working with the Damping setting to get almost noise gate-style effects – great on percussion.

Drum Buss: Tune your bass. One easy tip is “play with Drum Buss.” This Live effect is useful for coloring and compression and punch on all kinds of tracks, not just its marketed feature of being able to make your kicks bang more.
But let’s get specific: you can tune Drum Buss’ low-end enhancer (the Boom bit that gives you that low frequency thump). An easy-to-miss Force To Note parameter at the bottom – next to Dry/Wet and the headphones – will set the low frequency to a MIDI pitch. First, adjust the Freq knob to a frequency. Then, click this button, and it will quantize the frequency to the nearest (12-tone-equal tempered) pitch.

Vocoder: Go stereo. Ableton’s Vocoder is a powerful and flexible device, not only useful for robotic vocal sounds, but as a way of transforming other signals, as well. On the right, there’s an L/R switch that sets it to both stereo carrier and stereo modulator mode. (It might not be immediately obvious that’s what L/R means!) There are a lot of different faces to this effect, because you can then choose one of four carrier modes for different ways of modulating the input, and from 4-40 bands for radically different sounds, retro to modern.
And yes, all of this works well on percussion, again.
Got more?
I am 100% sure this discussion will prompt more tricks, particularly as here in Berlin we have a lot of geeky producers and the people who developed these tools and designed sounds for them. So if you have more areas you want to explore, or have tips of your own, get in touch – and stay tuned for the next episode of this series.
PETER KIRN is a lifelong composer/musician and has used Live since version 1, among teaching and using various other tools. In addition to producing CDM (cdm.link) since 2005, he has released music on Detroit Underground, Instruments of Discipline, Kotä Records, Snork Enterprises, and his own Establishment. He has also worked with spatial sound, modern dance, and other fields.
Follow us on Instagram 
If you like this article, please share it in your favorite producer group on Facebook or any other social media, thanks!
Related articles
Tutorial: Super Fast Arrangement in Ableton Live 10

The full story about my Techno Live Act by MOUT